Masking
Masking is a computer vision technique that uses one image to define which parts of a second image should be visible or processed. Think of a mask as a stencil: only the areas that are “cut out” by the mask are allowed to pass through.
In computer vision, a mask is a binary image (pixels are either black or white).
- White Pixels (255): These represent the area you want to keep or process (the stencil’s “cutout”).
- Black Pixels (0): These represent the area you want to ignore or hide (the stencil’s solid part).
How Masking Works
Masking is typically performed using the Bitwise AND operation, where the two input images—the Source Image and the Mask Image—are compared pixel by pixel:
Result Pixel = Source Pixel ∧ Mask Pixel
- If the Mask Pixel is White (255): The source pixel is preserved, and its original color/value is copied to the final result.
- If the Mask Pixel is Black (0): The source pixel is blocked, and the final result pixel is set to black (0).
The result is the original source image, but with everything outside the white area of the mask turned black.
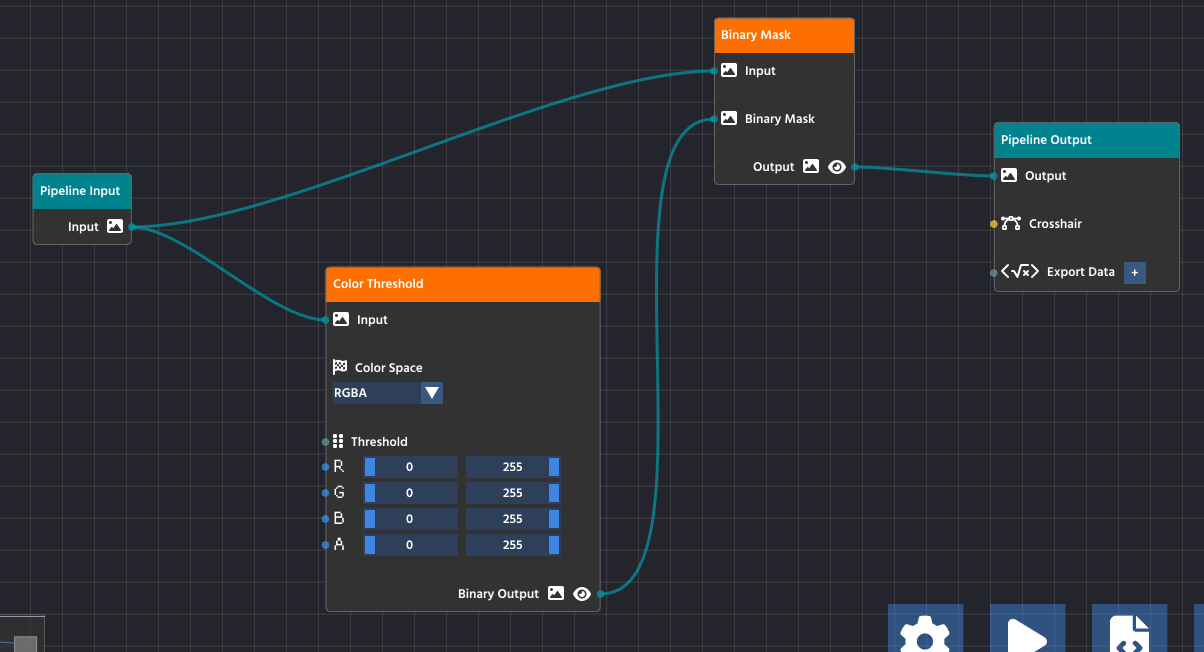
Masking in PaperVision
In PaperVision, you will use the Binary Mask Node (found in the Image Processing category) to apply this operation.
The Binary Mask you use is typically the result of a Thresholding operation. For example:
- You use a Threshold Node to turn a complex scene into a simple Binary Mask where your target object is white, and everything else is black.
- You pass the original, full-color image and the new Binary Mask into the Mask Node.
- The Mask Node outputs the original image, but only the object of interest remains in color; the rest of the image is blacked out.
This article was last modified...
On 2026-03-24 15:33:26 -06:00
By Sebastian Erives
See it here:45c264b011116795e50b249f60f5638fdaebc4bd